 |

|
 |


Begin OCR Text:
g
_g
__ _ j
_E_AI _ I NS__U__IONS
Head_l_l_g
The headl_n_ng (fig 8-48) iS StreChed on a WOOden
f_bre frame and _s provided w_th a numbef Of Stfet-
Áherg whiCh keep the headl_ning at fuIl StretCh
When remov_ng. first release fhe holder for the
gun vigor W_th a suitable tooI bend doWn the end
of the gtretÁhers all round the edge of the roof so
that the clips release and the headI_n_ng can be
taken down
Re_OVl_g _fO_t SeatS _,oo_L,v,D_
Release the snap buttons hoId_ng the cush_on to _ _ _
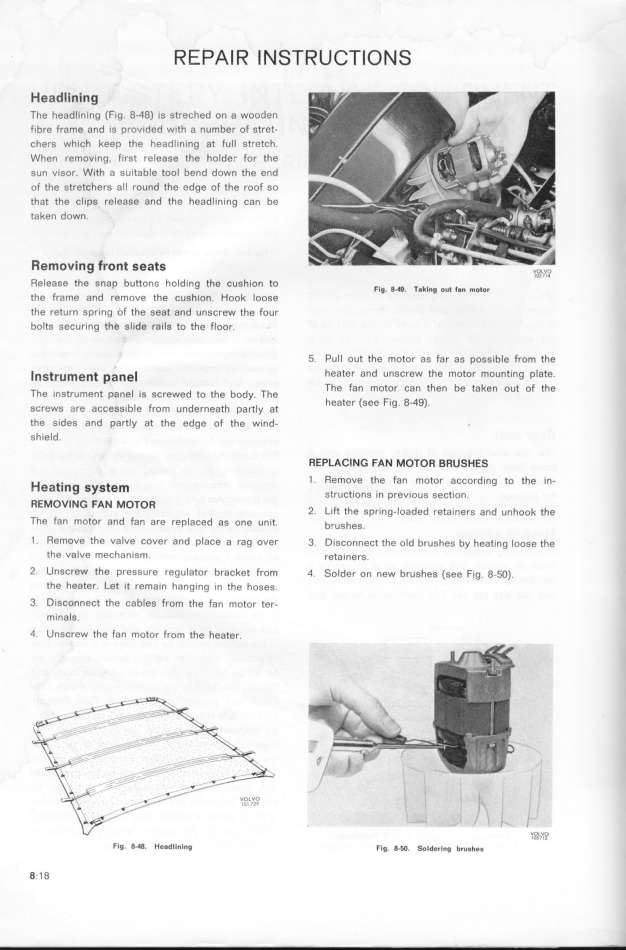
F_g. 8_9. 8 l_$ out 8_ motor
the frame and remoue the cushion Hook loose
the return Spring of the Seat and UnSCreW the four
bo_tg geÁuring the glide ra_lg to the floor 5 _u__ out the motor aS faf aS poSSible ffom the
_ _ _ _ heater and unscrew the motor mount_ng plate
CIS fU_eIt _a_e The fan motor can then be taken out of the
The instrument p8nel is screwed to the body The )
heater (see F_g 8-49
screws are access_ble from underneath partly at
the s_des and partly at the edge of the wind-
shield REPLACING FAN MOTOR BRUSHES
1 Remove the fan motor accord_ng to the in-
HeatjfIg SySte_ StruCtlOnS In pfeVlOUS SeCtlOn
REMOVING FAN MOTOR h h
2 Lift the spring_Ioaded retainers and un ook t e
The fan motor and fan are replaced as one un_t brugheg
1 Remove the valve cover and place a rag ouer 3 Disconnect the old brushes by heating Ioose the
the ualve meÁhan_sm retainerg
2 Unscrew the pressure regulator bracket from 4 _oIder on new brushes (see Fig 8-fO)
the heater Let _t remain hanging in the hoses
3 Disconnect the cables from the fan motor fer-
m_nals
4 Unscrew the fan motor from the heater
.
|

