 |

|
 |


Begin OCR Text:
vo
_P__
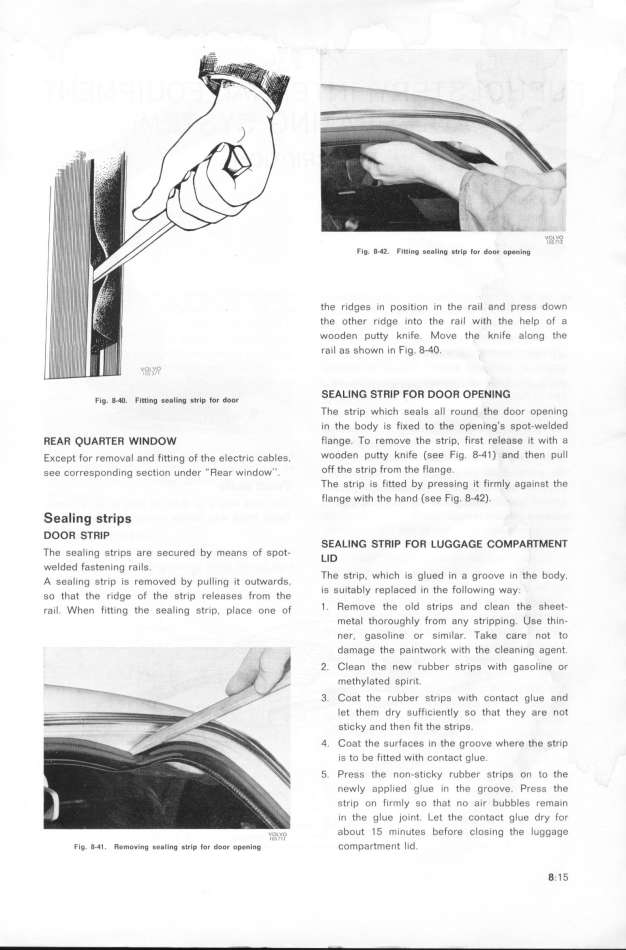
Fig_ 8_42_ Filling sealing st,ip lo, doo, ope,_,g ''O''''l''_
the ridges in posit_on _n the ra il and press down
the other ri'dge into the rai I with the he_p of a
wooden putty knife. Move the kn ife a long the
ra_l as shown in Fig. 8-4O.
F.,g. g_. F.,,,.,,g ,,,_.,,g ,,,.,p _,, d,,, SEALING STRl P FoR Doo R opEM I NG
The strip wh ich seals all round the door open ing
in the body is fiKed to the opening's spot-welded
REAR _UARTE R Wl NDOW flange. __o remove the strip. first releage it with a
EKcept for remova I and fitting of the electr_š šab_es, WOOden Putty knife (see F_g. 8-4 1 ) and then pul l
see corresponding section under __ Rear w_ ndow_ _. oFf the strip from the flange.
The strip is fitted by pressi ng it firmly aga inst the
flange with the hand (see fig. 8_42).
Seaj I _g Stf_ _S
DOOR STRlp S EALl N G STRl P FO R LuGGAGE _o_pART_ENT
The Seal Ing StripS are SeCured by means of Spot- L_ D
welded fasten ing rai Is.
A sea __ ng str_p _is removed by pu_ __ ng __t outwards, The StFlp, Wh_ Ch IS gl Ued in a gfooVe in the body.
so that the r__dge oF the str_ p re_eases From the l S S Uitably replaCed in the following way_.
ra_ l. When fitt_ng the sea__ng str_p, p_aše one oF 1 _ Remove the old strips and clean the sheet-
metal thorough Iy from any stripping. Use th in_
ner. gaso1ine or simi lar. Take care not to
_ . damage the pa intwork with fhe clean ing agent
2. Clean the new rubber strips with gasol ine or
methylated spi rit.
3. Coat the rubber strips with contact gl ue and
Iet them dry SuffiCiently so that they are not
sticky and then fit the strips.
4. Coat the surfaces i n the groove where the strip
is to be fitted with contact g _ue.
5. Press the non-sticky rubber strips on (o the
newly a ppl _ed g lue _n the groove. Press the
str_p on f_rmly so that no air bubbles rema in
in the g lue joint Let the contact glue dry for
v,,u,Lv,o, about 1 5 min uteS before CloSi ng the luggage
Fig_ _41 _ Removing sealing st,ip lor dDDr opening šompartment _ _d. 8_. 1 5
|

