 |

|
 |


Begin OCR Text:
FITTl N_ REAR Wl NDOW
1 . Moisten the outer edge of the window and fit
on a rubber strip slarting at one of the corners.
Adjust the strip so that it is f_tted properly all
round.
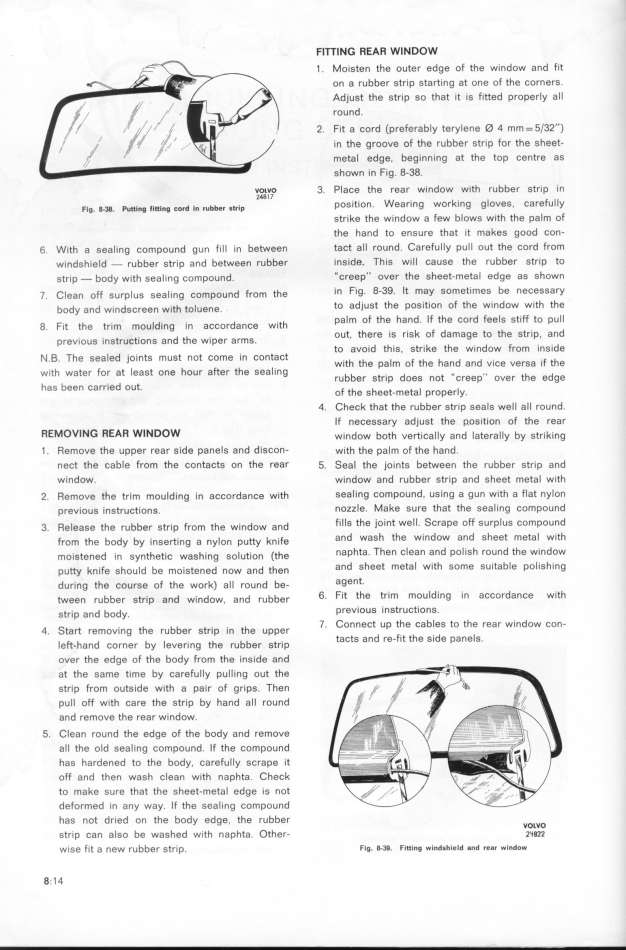
2. Fit a cord (preferably terylene _ 4 mm = 5/32'')
in the groove of the rubber strip for the sheet-
metal edge. beginning at the top centre as
shown in Fig. 8_38.
v_o$Lv,_o 3. Place the rear window with rubber stri p i n
F,$. g.3g. p,_,,g __,_,,g ,o,d ,, ,,bbe, ,_;p positÝon. Wearing Working g loveS, CarefUl Iy
strike the window a few blows with the pa Im of
the hand to ensure that it makes good con-
6. With a seal ing compound gun fill in between tact all round. Careful Iy pu l l out the cord from
windshield - rubber strip and between rubber inside. This w_l I cause the rubber strip to
strip - body with seali ng compound. _ creep'' over the sheet-meta l edge as shown
_. C_ea, o_ g,rp_,g gea_ ;,g šompou,d From the in Fig. 8-39. It may sometimes be necessary
body a,d w,,dgš,ee, w_th to_uene. to adjuSt the poSition of the window w_th the
g F,t the tr._m mou_d._ng .;n aššo,da,še w._th palm of the hand. If the cord feels stiff to pul l
' prev.,oug .,,gtrušt.,ong and the w.,per a,mg out, there is risk of damage to the strip, and
' to avoid this, strike the window from inside
N . B. The Sealed )OintS must n Ot Come in contaCt w._th the pa_m oF the ha,d a,d v._še verga ._F the
with water for at least one hour after the seal ing rubber gtr.,p doeg not ..š,eep., ove, the edge
has been carried out. oF the gheet-meta_ proper_y.
4. Check that the rubber strip seals well all round.
If necessary adjust the p.osition of the rear
REMOVl NG ffEAR WIN DOW w__ndow both vert__ša_ _y a,d _ate,a__y by gtr__k_,,g
1 . Remove the upper rear side panels and diScon- with the pa_m of the ha,d.
nect the cable from the contacts on the rear 5. Seal the jointg be_een the rubber gtrip a,d
WindoW. window a,d rubber gtrjp a,d gheet meta_ wjth
2. Remove the trim moulding in accordance with sealing compound. using a gun with a flat nylon
previous instructions. nozzle. Make sure that the sealing compound
3. _e_eage the rubber gtr_p F,om the w_,,dow a,d fills the joint well. Scrape off surp Ius compound
From the body by _,,ge,t_,g a ny_on putty k,_,Fe and WaSh the windoW #nd Sheet metal with
mo__gte,ed ,n gy,thet__š wagh_,,g go_ut_;o, (the naphta. Then Clean and pol ish round the window
pu_y k,,Fe ghou_d be mo_jgte,ed ,ow a,d then and sheet metal with some suitable polish_ng
during the šou,ge of the wo,k) a_ _ round be_ aaent.
_ee, ,ubbe, gt,_,p a,d w_,ndow. a,d rubber 6. Fit the trim moulding in accordance with
gt,ip a,d body. preViOUS _nStfUCt_OnS.
4. Start remov_;ng the ,ubbe, gt,.,p ._, the uppe, 7, Connect up the cables to the rear window con-
_e__ha,d šo,,e, by _ever__ ,g the rubber gtr._ p taCtS and re-fit the Side panel S.
ouer the edge of the body from the inside and
at the same time by careful Iy pu l Iing out the
strip from outside with a pair of grips. Then
pull off with care the strip by hand all round
and remove the rear window.
5. Clean round the edge of the body and remove
all the old seal ing compound. If the compound
has hardened to the body. carefully scrape it
off and then wash clean with naphta. Check
to make sure thaf the sheet-metal edge is not
deformed _n any way. If the seal ing compound
has not dr_ed on the body edge, the rubber ,o_vo
strip can also be washed with naphta. Other- jygjj
wi Se fit a new rUbber strip. Fig. B-39. Fit_ing windahield 8nd rear window
8. 1 4
|

