 |

|
 |


Begin OCR Text:
_ _ j _ __
oe A
u
_
_j
__
j_
_ __
j_
__
_j p
A_
_ _ A _ _
_
GROUP 84
_ E _A l _ _ N ST _ U _T l O N S
__.__ _ou_d___g edge of the ventilation window inwards, this enabl-
_ou_D__G ing the moulding to be drawn up.
WAIST _ d t th d _d_ g unde, the
n Of er O ,emOVe e OOf mOU In
_he waigt t,im moulding for the front fende,S, dOO,S ,ea, g._de w._,dow the w__,dow must F_i,gt be taken
and ,ea, fende,g is attached by menas of reSilient oFF To do th.,, Fo__ow the _,,,t,,št_,o,g g_,ve, ,,de,
š__ps. To remove the moulding, insert some suitable ., Rea, g.,de w._,dow__ _he mou_d.,,g ša, the, be ,e-
wooden too_ betwee, the body and the moulding d b _ . .'t _ t
T mOVe y re eaSlng l S p a e SCreWS_
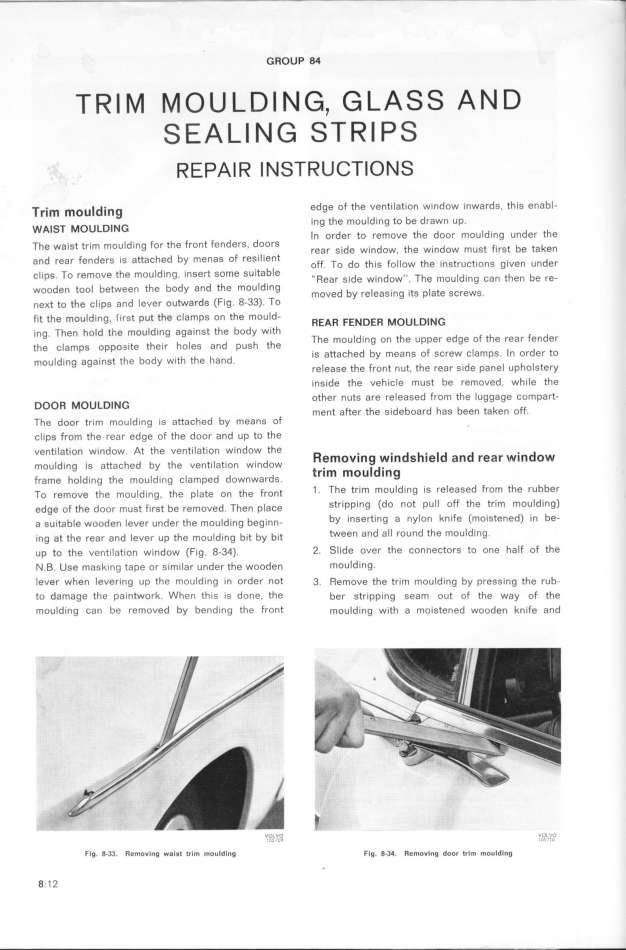
neKt to the š_ipg and lever outwards (Fig. 8_33). o
F_t the moulding. first put the clamps on the mould- ffEAff FE_Deff _ou_D__G
_,g Then ho_d the moulding against the body with F d
_ h _ d h h The moulding on the Upper edge oF the rear en er
the š_ampg oppo__ite thei, O eS an pUS t e i _ _ d
h h h d is attaChed by meanS o SCreW C ampS. , Or er tO
mou_di,g against the bOdy W_t t e an . h d _ h _
,e_eage the ffont nut, t e rear si e pane Up O Ste,y
_,side the vehicle must be removed, while the
other nuts are released from the luggage compart-
DOOR MOULDING FF
me,t afte, the SldebOard haS been taken O .
The door trim moulding is attached by means of
šlipg from the rear edge of the door and up to the
venti_ation window At the ventilation window the _ . . d _. _d d . d
' d e_oVl_g Wl_ _ le afl f_af Wl_ OW
moutding iS attaChed by the vent_lat_On Wln OW . id.
d tfl_ _OU l_g
Frame hold_ng the moU_dlng C_amped dOWnWar S.
To ,emove the mou_d__,g, the p_ate o, the F,ont I . The trim mouIding is released from the rubbe,
edge oF the doo, mugt F__,st be ,emoved. The, p_aše stripping (do not pull off the trim mOulding)
a gu.,tab_e wo,de, _eve, ,,de, the mo,_d_,,g beg_,,,- by inSe,ting a nylon knife (moiStened) in be-
._ng at the ,ea, a,d _eve_. up the mou_d__,g b__t by b_it tween and all round the moulding.
,p to the ve,ti_at_on w_,dow (F_g. g-34). 2. Slide over the connectors to one half of the
_._. use mashing tape or simýlar under the wooden mouIdin9_
Iever when levering up the moulding in order not 3. Remove the trim mouIding by pressing the rub-
to damage the paintworh. When this is done, the ber stripping seam out of the way of the
moulding can be removed by bending the front rnoulding with a moistened wooden knife and
''_'_'__PP'_W v,o.._._v,_oe f
''_''''' v.o._____,_o,
Fig. 8-33. Removing _alst lrim mouldtng Flg. 8_3_. Removing dDDr trim mouldlng
8_ 1 2
|

