 |

|
 |


Begin OCR Text:
_
_
/ _ _ 4. fif the fubbef šovefg on the p_ungef and houg-
Ing. FIt the jOCk f_ngS.
5. fit the brake padg. P_ace one of the fetaining
pins in posit_on and fIf the damping springs and ',
then the othef fetaining p_n. _ecufe the pins
with the hairpin-shaped retaining š_ipg. Chešk
that the pads are movable.
6. f_t the bleedš,_ nipp_es and a_go the brake ineg. '_
FITT__G __
1 . Place the caliper in position. Check that the _,
contact surfaces of the retainer are clean and
,,,o,,_v,,o nof damaged. Check the locat_on of the brake ,
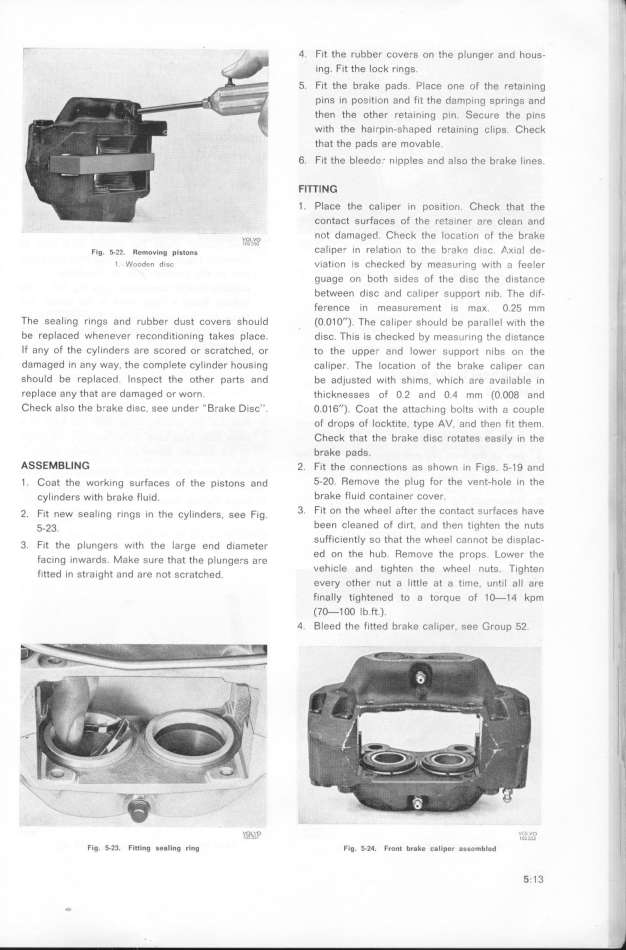
Fig. ____. ffe_ovi_g pig_o_g ' Calpef In relat_On tO the b_ak_. d_Sš _.K_a_ dg_ ',
1 Wooden disc viation is šhešked by me__g__.fino with a fee_ef __I
guage on both sides of the d_s_c the distance
between disc and cal_per support nib. The dif- _
FefenCe Ýn measurement _S ma_. O.25 mm
The SeaIlng r_ngS and fUbbef dUSt CoVerS ShoUld (O.O1 O''). The ša_ipef shou_d be para__e_ with the '__
_
ke fe__aše_ wkenevef fešon_ition_ing ta_eg p_aše __ __ _ _ _ _ _ _ t_ _. t
U _1 U _ U _ l . OlSC. l nIS IS CneCKeO Dy meaSUfIng ne OlS_ anšg
If any Of the CyIinders are sCored of SCfatChed, of to the uppef and _owef guppoft nibg on the
damaged In any Way, the COmplete Cylindef hoUSing ša_ipe_, . The _ocation of the bfake ša_ipef šan
ShOUld be feplaCed. InSpeCt the Othef parts and be adjugted with ghimg, which are avai_ab_e in
feplaCe any that afe damaged of Wofn. thicknesges of O.2 and O.4 mm (O.OOg and
CheCk aISO the b__ ahe d_SC, See under _Brake DiSC''. O.O16''). Coat the attašhing bo_ts w_th a coup_e
ol dropS of loCktite. type AV, and then fit them.
Check that the brake disc rotates easily _n the
bfake padS.
ASSEMBLl_G 2. Fit the šonnešfiong ag ghown in fiog. 5-1g and
1 . Coat the working gurfašes of the pigtong and 5-2O. RemOve the plug for the ven_t_hofe in the
cy_indefg with bfake f_uid. brake fIUld Containef CoVef.
2. F_t new sea__ng f__ngg _in the šy__ndefg, gee __g. 3, fif on the Wheel aftef the Contašt gurfašes haVe
5-23.
' been Cleaned of dirt, and then tighten the nuts
3 F h _ h h _ SUffiCiently So fhat the wheel šannot be disp_aš-
. It t e p UngefS W_t t e afgg end d_amgtef
F d _ k h ed on the hub Remove the props _owef fhe
aClng InWaf S. a e SUfe t at the p_Unggfg afg ' '
f d h d h vehicle and tighten the wheel nuts Tighten
Itte In Stfalg t an afe nOt SCratC ed. _
evefy ofhef nut a _itt_e ak a time, unt.i_ a__ afe
finally tightened to a torque of 1_14 kpm
(7_1 OO Ib_ft_)_
4. Bleed the fitted bfake ša_ipef, gee Cfoup 52. _
'_ _ _ g_____
=__.dq.,. _
_ -_ ,lOO5t_'_'Ol __Uu_l_,__Oz
Fig_ f2__ Fittin$ 8e8llng ring Fig. S_24. Front bra_e ealiper aggembled 5__ 13 _'__ _
|

