 |

|
 |


Begin OCR Text:
_ v_o___v_q3 3_
_ P 18OO
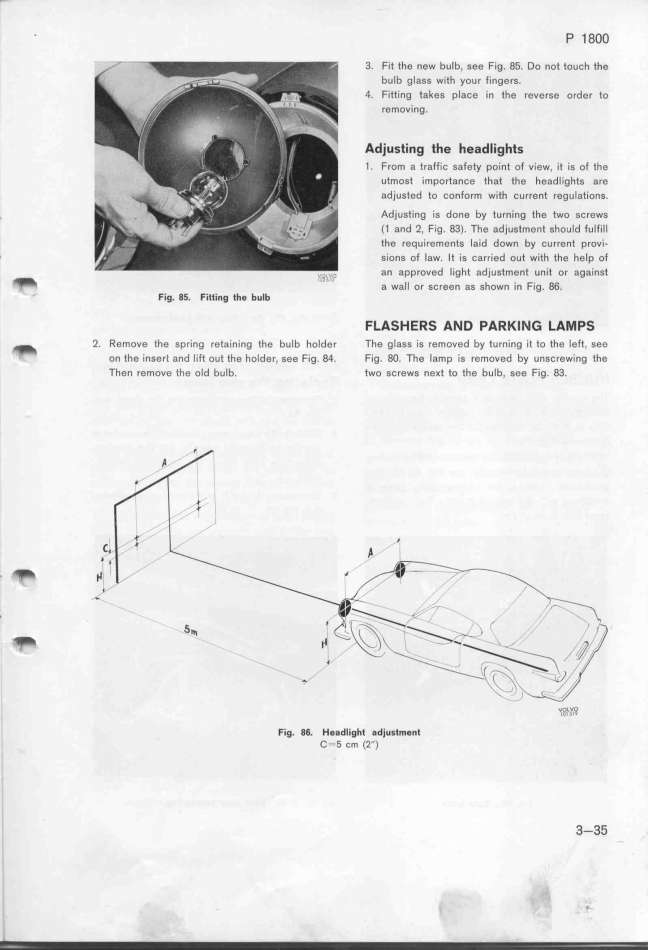
3. Fit the new bulb, see Fig. 85. Do not touch the
bulb gtass with your fingers.
4. Fitting takes place in the reverse order to
removing.
Adjusting the headlights
1. From a traffìc safety point of view, it is of the
utmost importance that the headIights are
adjusted to conform with current regulations.
Adjusting is done by turning the two screws
(1 and 2, Fig. 83). The adjustment should fulfilI
the requirements laid down by current provi-
sions of law. It is carried out with the help of
,,__,,u_ an approued light adjustment unit or against
_ ' ''_ a wall or screen as shown in Fig. 86.
Fig. 85. Fitti_g th_ bulb FLASHERS AND PARKING LAMPS
_ 2. Remove the spring retaining the bulb holder The glass is removed by turning it to the left. seG
on the insert and lift out the holder, see Fig. 84. Fig. 8O. The lamp is removed by unscrewing the
Then remove the old bulb. two screws neKt to the bulb, see Fig. 83.
_Cj,'
_ _ _li I
_l
_
.
,
|

