 |

|
 |


Begin OCR Text:
P
Remove the flywheel housing tog$ther with the
ge8rbo_ and then remove the clutch and
flywhe$l.
3. Remove the rear flange, taking c8re not to
damaQe the contact surfaces, the dyn8mo.
wat$r pump and distributor, rocker caGíng, roc-
ker arme. cylinder head and oil filter.
Remove the valve tappefs with tool SVO 2424,
see Fig. 35.
4. Remove the timing gear casing and timing
gears. For tools, see under the heading ''Re_
placing the tim'ing gears''. Remove the cam-
shaft.
5. Stand up th$ engine on ite rear end on a bench.
_ Place three wood8n blocks under it so that
the crankshaft can rotate freely. Remove the
carbon ridg$ from the cylinder bores.
Remove the sump, oil pump and connecting ..,.,
rods with pistons_ Replace tfe caps correctly Fig. 3_. ff$movi_g thg v8_vg tgppg_g
_ on their respective connecting rods.
_ 6. Turn the engine upside down and remove the
crankshaft. Replace the caps correctly in their them through with a special brush and then blow
respective pistons. them out with compressed air. All sealing plugs
at the oilway op$nings in the cylinder block must
tlEAN_NG be removed while cleaning is carried out.
After dismantling, all the parts should be tho- ty EAD AND vA vE_
,ough_y ç_ea,ed. pa_g made o_ g_$e_ o, çag_ i,on LINDER H L
c8n be waShed in a degreasing tank With a D_is_ont__ing
caustíc soda solution. L_ight-alloy parts can, how-
evg,, be dgg_,oyed by çaugt_,ç goda go that _hey 1_ RemoVe the rUbb0l SeaIS_ Remove the v8lVe
ghou_d p,e_e,ab_y be ,_ea,ed w_ith wh_ite gp_,,_,t. springS by firSt CompreSSing them With Valve
p_,gto,g a,d bea,,_,Q ghe__g mugt ,eve, be waghed pliers and removing the valve CottefS, after
_in çau6t__ç goda. R_,,ge the pa,tg w_,th wa,m wgte, whicf the pliers are releaSed. PlaCe the valveS
and b_ow them dy w_ith çomp,egggd a_i, a_te, in order in a stand_
_ wggh_ing. 2. Measure the Clearance between the Stem and
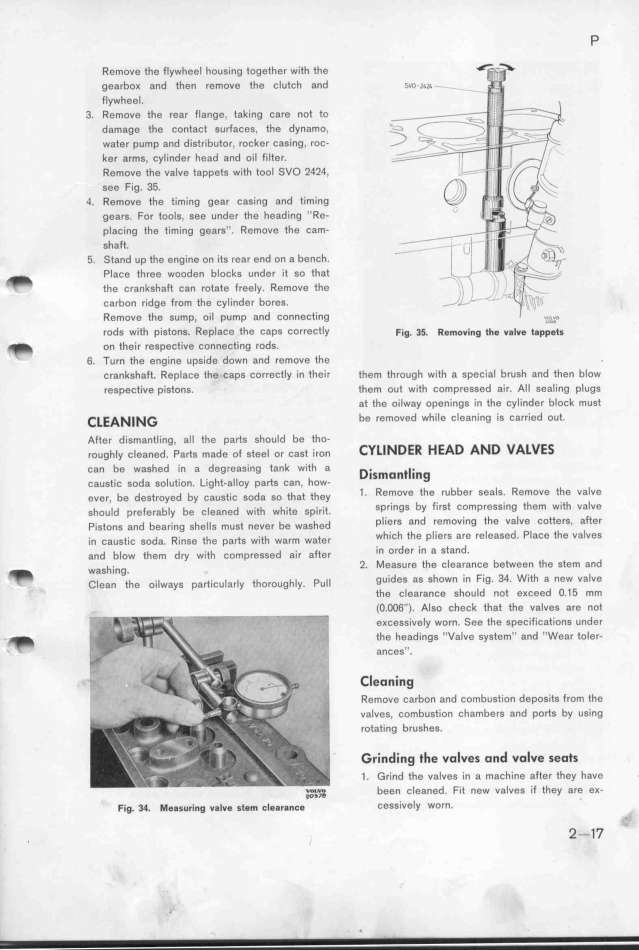
__e,, th, ,_,_w,y, p,,t;,,_a,_y th,,,,gh_y. p,__ 9UideS aS ShoWn in Fi9_ 34_ Wíth a n$W VaIV0
tfe clear8nce should not e_ceed O.15 mm
(O.OO6''). Also cfeck that the valves are not
e_cessively worn. See the specifications under
_ th$ headings ''Valve system'' and ''Wear toler_
_ anCeSI'.
tleoning
Remove carbon and combustion deposits from the
valves, combustion chambers and ports by using
rotating brushes.
Grinding the volves ond volve seots
1. Grind the valves in a machine after they have
__ _ been cleaned. Fit new valves if they are e_-
Fig. 34. _ggg__i_g vg_ve gtgm __gg_g__$ CessiveIy WOrn_ ,
. 2-17 '-
|

